CHAPTER 72
Anterograde Versus Retrograde Lead Placement
INDICATIONS
The discussion for an anterograde approach versus a retrograde approach to lead placement for spinal cord stimulation (SCS) has evolved in relationship to optimal coverage for pelvic pain conditions. Early attempts to treat bladder pain focused on retrograde placement of SCS leads to the S3 foramen. Unfamiliarity of many practitioners with this technique, the more difficult technical aspects, and the variable anatomy of the sacrum have all posed challenges to this approach. Anterograde placement with lead positioning at the T10-T12 levels has shown great promise in pelvic pain structure coverage. It is now known that retrograde placement is actually a peripheral nerve stimulation performed within the spinal canal by stimulating specific sacral nerves. Whereas anterograde placement is true spinal cord stimulation giving rise to stimulation paresthesia not only in the pelvic distribution but also in the lower extremities. Anterograde stimulation produces an electrical field at the spinal cord activating all known mechanisms of action, whereas it is highly unlikely that peripheral nerve stimulation activates as many different mechanisms of action.
Indications for retrograde placement/anterograde placement include:
• Interstitial cystitis, urge incontinence, urgency/frequency
• Postoperative pelvic pain/pelvic adhesions
• Endometriosis
• Postradiation pelvic pain
• Vulvodynia
• Vaginal pain
• Coccydynia
CONTRAINDICATIONS
The basic procedural/surgical contraindications hold for a trial of retrograde or anterograde SCS. These include:
• Anticoagulation
• Thrombocytopenia
• Immunocompromised patient
• Sepsis
• Localized infection at or near insertion site
Added contraindications specific to SCS include:
• Implanted cardiac defibrillator
• Inability to use or understand the equipment
• Need for ongoing repeat MRIs
• Untreated psychiatric or addiction issues
RELEVANT ANATOMY
Pelvic Innervation
1. Sympathetic (T12-L2)
a. Superior hypogastric plexus—largest sympathetic contribution
b. Sympathetic chain—gray rami communicantes connect to sacral ventral primary rami
c. Sacral splanchnic nerves—smaller contribution of sympathetics to pelvic viscera
2. Parasympathetic
a. S2, S3, S4
i. Inferior hypogastric
plexus—preganglionic
ii. Postganglionic fibers innervate distal colon, rectum, bladder, genital organs
All pelvic viscera receive dual innervation, sympathetic and parasympathetic. Both converge at the inferior hypogastric plexus and are redistributed either directly to target organs within the plexus or via smaller subsidiary plexuses.
3. Somatic efferent and afferent innervation to the pelvis
a. S2-S4
There is a recognized midline dorsal column pathway within the spinal cord that mediates the perception of visceral pain and if interrupted relieves visceral pelvic pain in cancer patients. Therefore, SCS systems and settings that can drive stimulation deeper into the dorsal spinal cord may respond better. Recent studies have shown higher pulse width settings drive activation of the more medial fibres and may be optimized at 900 to 1000 ms. Thus, anterograde stimulation at T11-T12 with high pulse widths may represent the best potential for achieving a bilateral pelvic analgesic response. This is in distinction to a unilateral discreet activation that may be achieved with retrograde stimulation of individual sacral nerve roots.
PREOPERATIVE CONSIDERATIONS
• Informed consent and full explanation of all potential risks and complications including infection both superficial and deep including epidural abscess.
• Anticoagulation status. Patients on coumadin should have their INR normalized with consultation and consent from their cardiologist. Antiplatelet medications should be stopped for 7 days and all other anticoagulation medications recommendations should follow the most current ASRA guidelines.
• Physical examination of the proposed area of epidural access for evidence of infection, skin ulceration, or rash.
• Patient must be able to lie prone on bolsters or Wilson positioning frame for intended length of procedure.
• Intravenous access for IV fluids, preoperative prophylactic antibiotics, and medications for sedation or any untoward reactions.
• Cefazolin 1 gm, or 2 gm for patients over 80 kg up to 1 hour pre-needle insertion. Clindamycin 900 mg for patients with allergy to cephalosporins. Vancomycin 600 to 1000 mg for patients with previous history of MRSA infections.
Fluoroscopic Views
• Anterograde positioning. Appropriate craniocaudal positioning to open intralaminar spaces at L2-L3 and/or L3-L4 (may use best intralaminar space from T12-L3 down). Needle placement is a paramedian approach starting with insertion over the pedicle on the ipsilateral side one level below intended intralaminar target entry position.
• For dual lead trials, use one level below on the ipsilateral side.
• Another option is to use the same intralaminar entry point starting on the contralateral side.
• Retrograde positioning. Appropriate craniocaudal views to open intralaminar space below L2 so that needle insertion is below conus.
• Skin entry at either 10 o’clock or 2 o’clock position, aiming at lamina and walking off to the midline for entry into the epidural space.
Equipment
• 14-gauge Epimed Coude needle (Pyles epidural needle another good option)
• Pulsator loss of resistance syringe
• 25- or 27-gauge needle for skin infiltration
• 18-gauge needle for skin penetration
• Mastisol
• Merit Stayfix dressing
• Opsite
• SCS leads of choice
Medications
• 1% lidocaine
Technique
Preferred Technique for Anterograde Positioning
I prefer to use a left-sided paramedian placement technique with ipsilateral placement of both leads in a dual lead trial. This will mimic placement for a subsequent implant (if the trial is successful) as this facilitates placement through one incision with no need to cross the midline with one lead. It also allows the option for a “one incision technique” with development of the generator pocket lateral from the single incision if desired.
The development of the Epimed Rx Coude tip epidural needles (Figure 72-1) has made the placement of cylindrical SCS leads much easier and safer. The current needles on the market are the Epimed 14-gauge Rx Coude needle, the RX-2 (Figure 72-2), and the similar gauge Pyles (Figure 72-3A-E) epidural needles. These needles allow entry into the epidural space at a much reduced angle and facilitate easy passage of the lead into the epidural space. Their shape also allows enhanced ability to steer the lead right or left at the initial insertion by turning the bevel left or right in the epidural space. The RX rear heel is rounded to resist lead shearing during placement. The RX-2 blunt obturator stylet can provide safer rotation and advancement of the needle and is purported to deflect any neural structures during needle rotation.
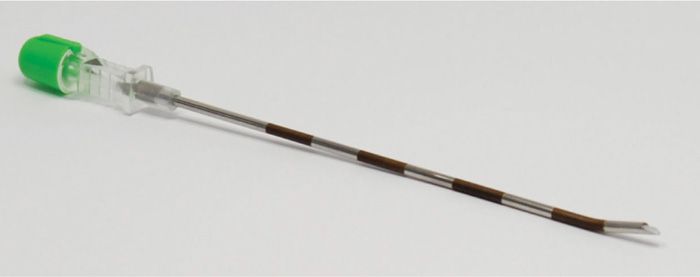
Figure 72-1. 14-gauge RX Coudé. (Reproduced with permission from Epimed.)
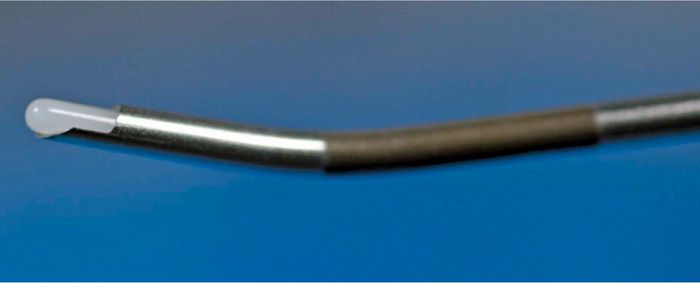
Figure 72-2. RX-2 Coudé with blunt obturating stylet. (Reproduced with permission from Epimed.)
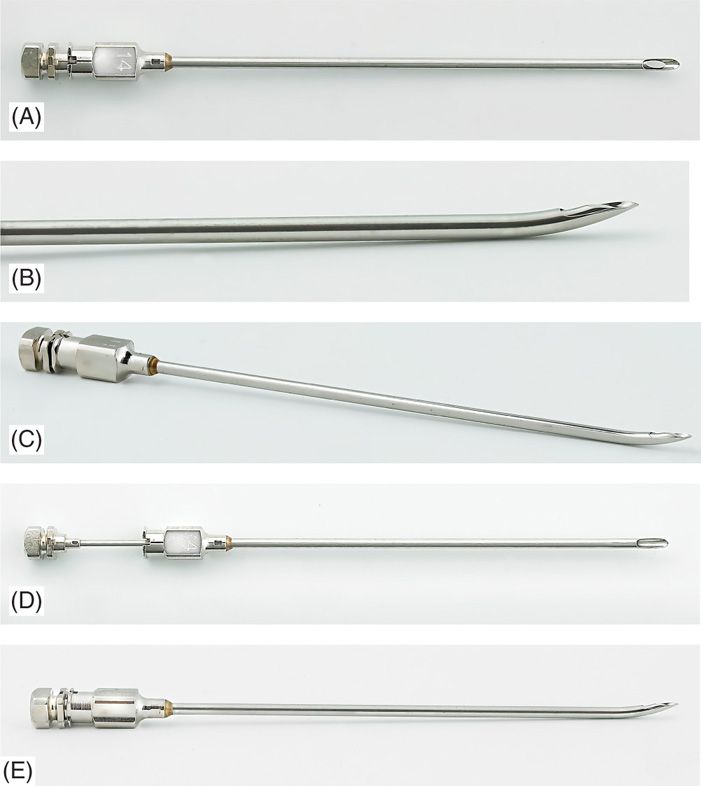
Figure 72-3. (A-E) Gauge Pyles epidural needles.
Tip: Have the bevel facing caudally on initial insertion to enhance appropriate tissue penetration toward the intralaminar space. The practitioner can then turn the bevel cephalad as he/she nears the epidural space as viewed on lateral fluoroscopic view. There are many techniques for epidural access, but I have used the loss of resistance technique with a Teflon-coated epidural syringe, combined with A/P and lateral fluoroscopy. The older technique of using glass syringes is less sensitive and may pose some risk. Any blood from contacting periosteum can coagulate in the syringe and there will be loss of glide within the syringe potentially leading to a wet tap. In elderly patients who have significant calcified ligamentum flavum, glass syringes have been known to break at the barrel.
• The patient is placed in a prone position with either pillows or bolster under the abdomen to reverse the lumbar lordotic curvature (Figure 72-4). Alternatively, the patient can be positioned on a Wilson frame for optimum stability.
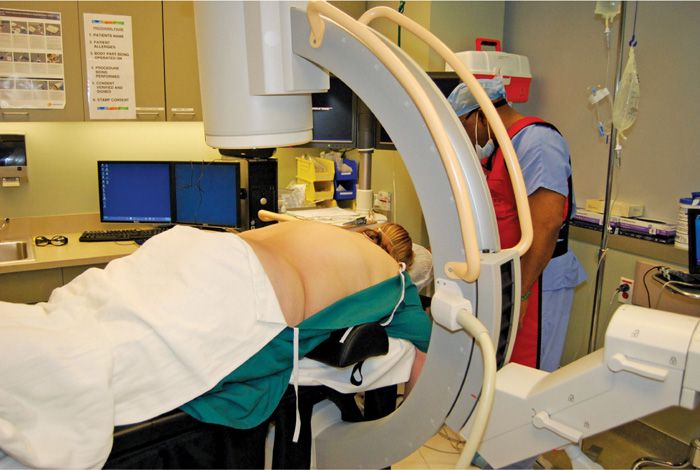
Figure 72-4. Positioning.
• The 12th rib is identified under AP fluoroscopy and the best intralaminar entry site is identified.
• The pedicle corresponding to one level below the proposed intralaminar entry site is identified (Figure 72-5).
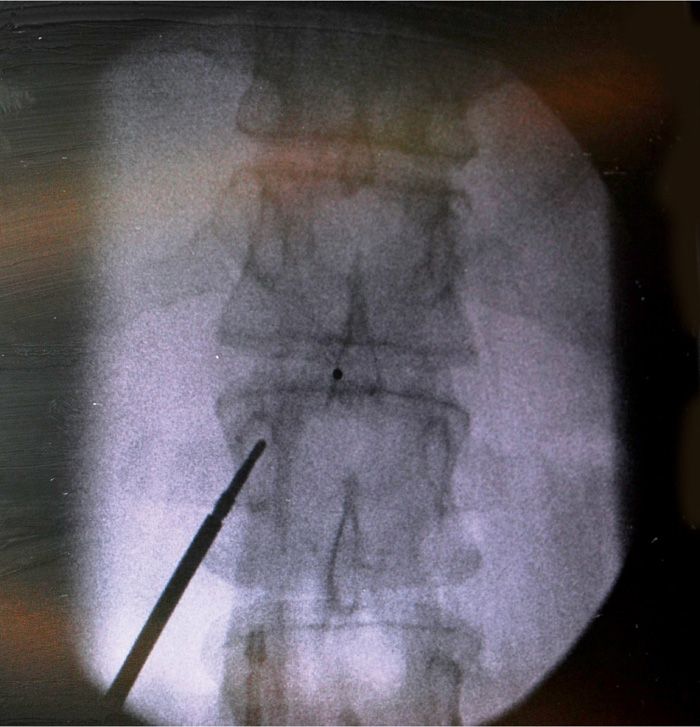
Figure 72-5. Entry point for Coude needle.
• A wide field around this region is prepped with Chloroprep. Chlorhexadine has been shown to be far superior to iodine-based skin prep solutions in reducing skin bacteria count.
• The prepared area is draped with either squared off surgical towels or adhesive transparent 3M Steridrapes (1010).
• An appropriate surgical aperture drape is then used for infection prevention (Figure 72-6).
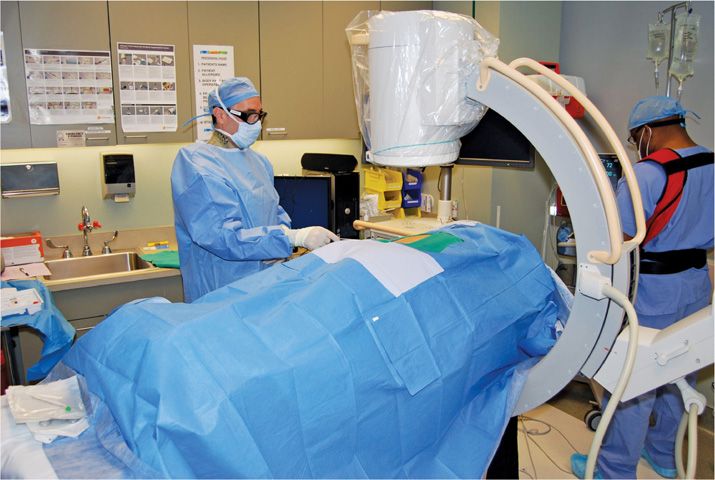
Figure 72-6. Surgical draping of SCS trial patient.
• The previously identified pedicle is marked and will be the site of skin entry.
• Local anesthetic, 1% lidocaine, is infiltrated with a 27- or 25-gauge needle to provide appropriate skin and subcutaneous analgesia.
• A skin nick is made with a 20-gauge needle to facilitate insertion of the 14-gauge epidural needle.
• The needle is inserted and directed under live fluoroscopy medially toward an imaginary midline entry point at the desired intralaminar space one level above the pedicle insertion point. Using a long-handled forceps can facilitate directing the needle tip under live fluoroscopy while keeping the operators hands well out of the image intensifier (Figure 72-7).
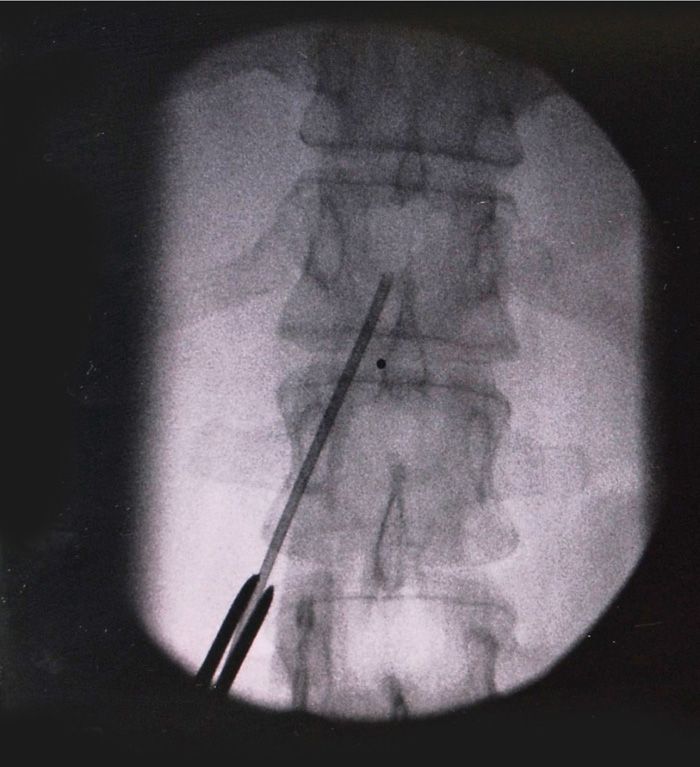
Figure 72-7. Using a forceps to direct needle to intralaminar.
• Using A/P and lateral fluoroscopy combined with the loss of resistance technique the needle is placed successfully into the epidural space (Figure 72-8).
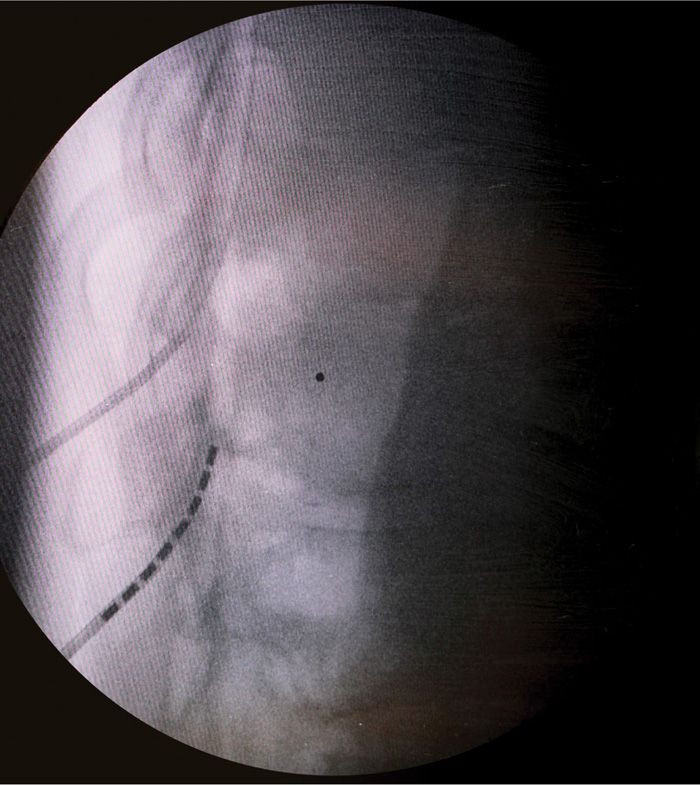
Figure 72-8. Lateral view of dual lead insertion.
• The use of the lateral fluoroscopic view is important as the needle enters the epidural space. You will be in the correct position for lead insertion to make sure the lead entry is in the posterior epidural space.
• A second lead is placed one level below on the ipsilateral side (Figure 72-9).
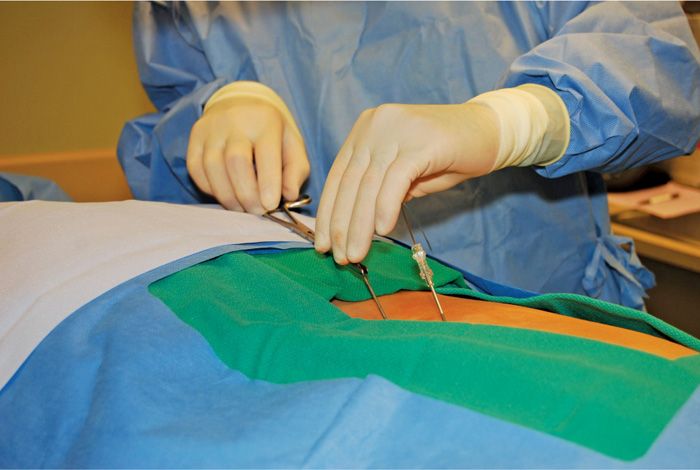
Figure 72-9. Dual lead insertion ipsilateral.
• A/P fluoroscopy is then used to guide the leads to the appropriate thoracic level, usually T10-T12 for pelvic pain, based on cutaneous stimulation paresthesia reports by the patient during the on table trial (Figure 72-10).
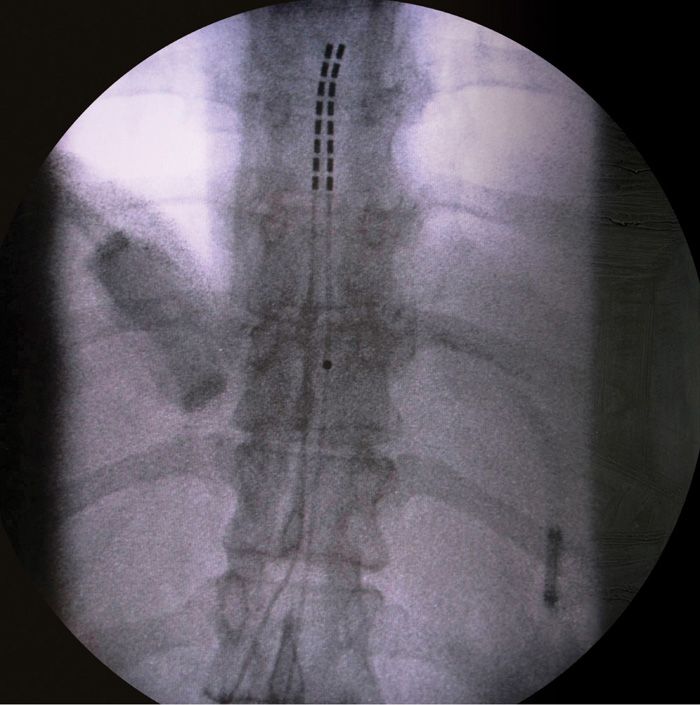
Figure 72-10. Dual lead final placement.
Preferred Technique for Retrograde Placement
• Positioning, prepping, and equipment are the same as above.
• Craniocaudal tilt of the C-arm is used to open the intralaminar space at either L2 or L3, which is below the conus of the spinal cord for safety in needle insertion.
• The desired skin entry point is overlying either the 10 o’clock or 2 o’clock position on the lamina (Figure 72-11).

Figure 72-11. The 10 o’clock and 2 o’clock entry position.
• As opposed to the normal entry technique for anterograde epidural needle placement, the goal is to use the periosteum as a backstop from which to advance the Coude needle into the epidural space using direct fluoroscopy combined with the loss of resistance technique.
• The angled bevel on the Coude style needles allows for the easiest insertion in a retrograde approach.
• The needle bevel can either be directed directly medial and turned once the epidural space is entered, or directly on an angle into the epidural space (Figure 72-12).
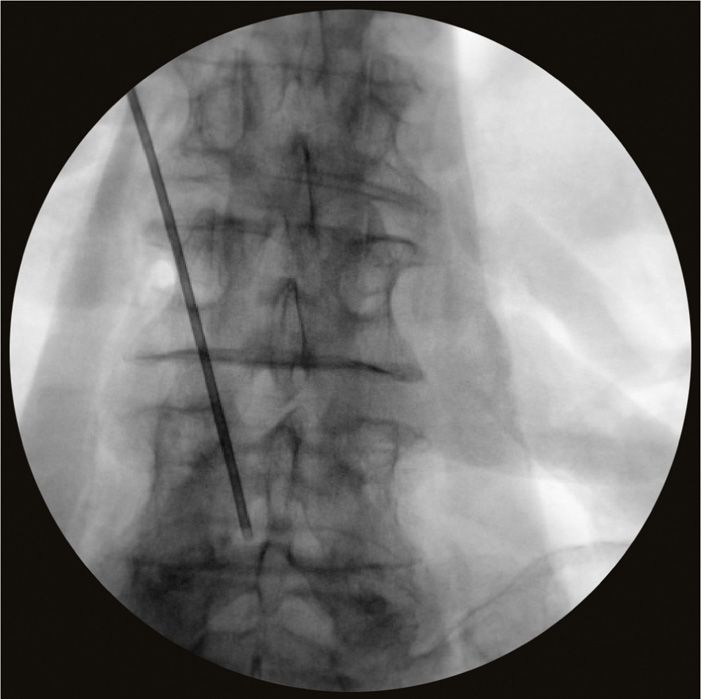
Figure 72-12. Retrograde needle placement.
• The lead of choice is inserted into the epidural space with no regard for anterior versus posterior placement as this has no bearing in a retrograde placement.
• The lead must be steered and directed into the desired sacral foramen depending on diagnosis of injury or desired level intended to treat (Figures 72-14 and 72-15).
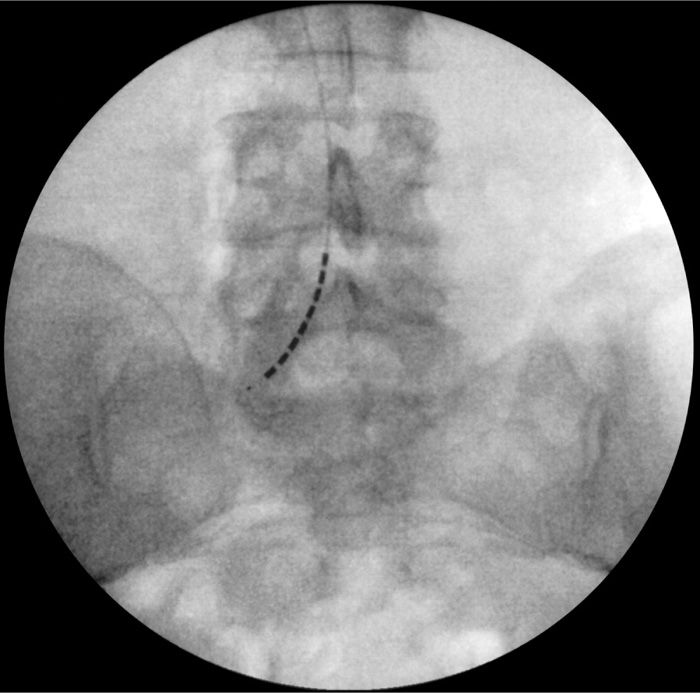
Figure 72-13. Unilateral retrograde lead placement.
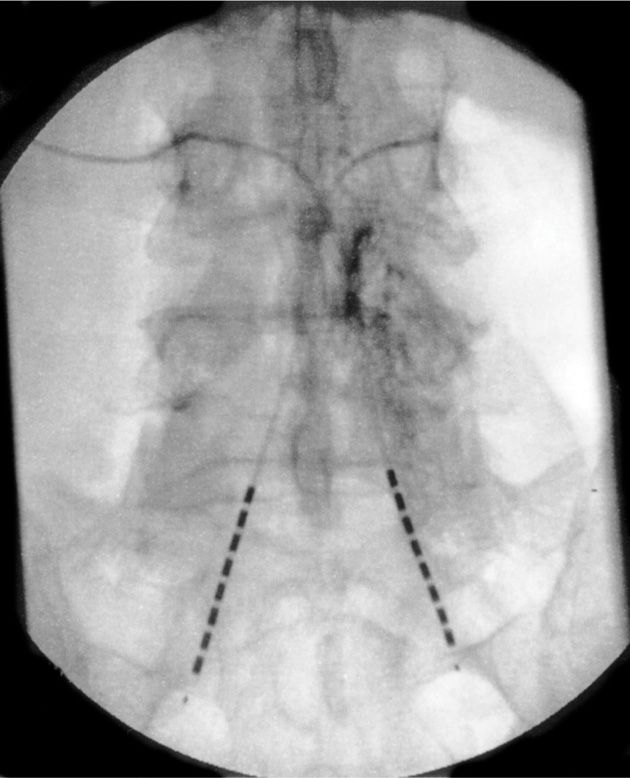
Figure 72-14. Bilateral retrograde lead placement.
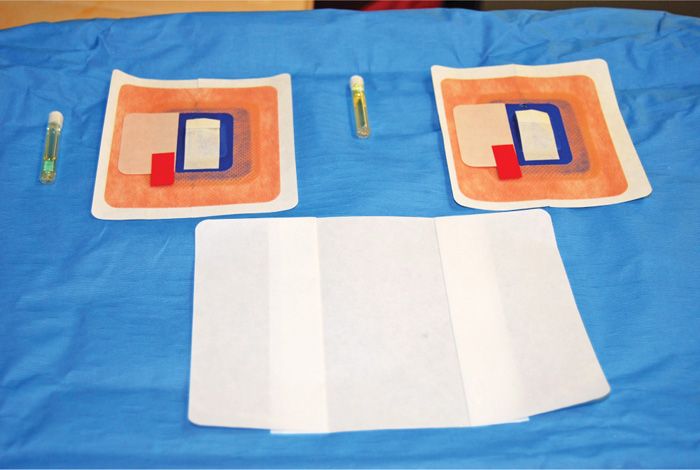
Figure 72-15. Mastisol, Stayfix dressing, and Opsite.
• The lead only needs to enter the foramen and does not need to extend beyond the foramen.
• On the table, testing for appropriate stimulation paresthesia is then carried out and optimized.
Preferred Lead Fixation
• Many techniques have been described for anchoring temporary percutaneous trial leads and the following is my preferred technique.
• The inferior lead insertion site is anchored first, with the skin swabbed with mastisol (Figure 72-16).
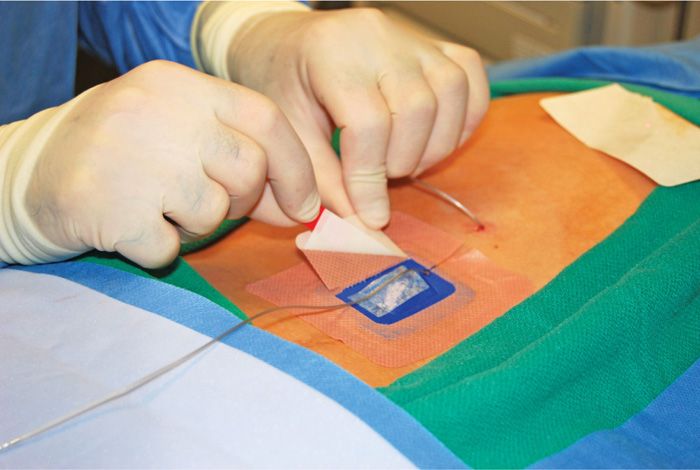
Figure 72-16. Apply lower lead Stayfix dressing first.
• A Merit, Stay-fix dressing is applied to the skin and the lead is carefully placed through the split into the adhesive groove. The cover adhesive tab is then massaged onto the lead to ensure adherence (Figure 72-17).
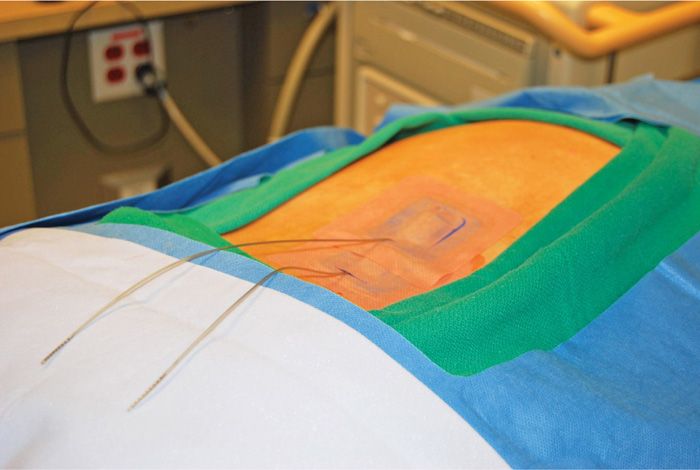
Figure 72-17. Two trial leads in place with Stayfix dressings.
• This is then repeated for the upper lead insertion site.
• A clear adhesive dressing is then placed over both lead anchors and tape is used along the adhesive/skin boundary.
POSTPROCEDURE FOLLOW-UP
• As per ASC protocol, the patient is always called the next day to assess for any problems or issues.
• The patient is instructed to avoid getting the insertion sites wet, and to only sponge bathse.
• A small amount of bleeding from the needle insertion sites may occur and the patient and family are informed of this. No significant bending or heavy lifting is allowed.
• Any signs of weakness, urinary, or bowel incontinence, significant bleeding or increased pain should be reported.
• Assessment for correct stimulation paresthesia is verified daily by either office staff or device manufacturer field representatives, as well the patient is seen in office mid- trial for reassessment and reprogramming if necessary to ensure an effective trial.
Related posts:


Stay updated, free articles. Join our Telegram channel

Full access? Get Clinical Tree


