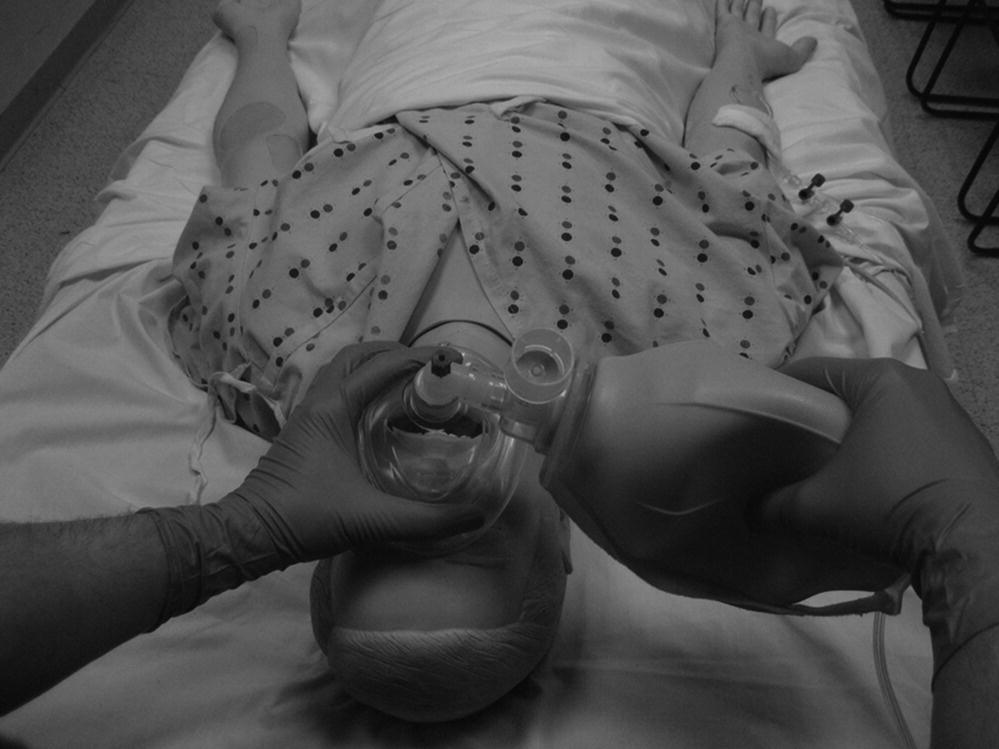
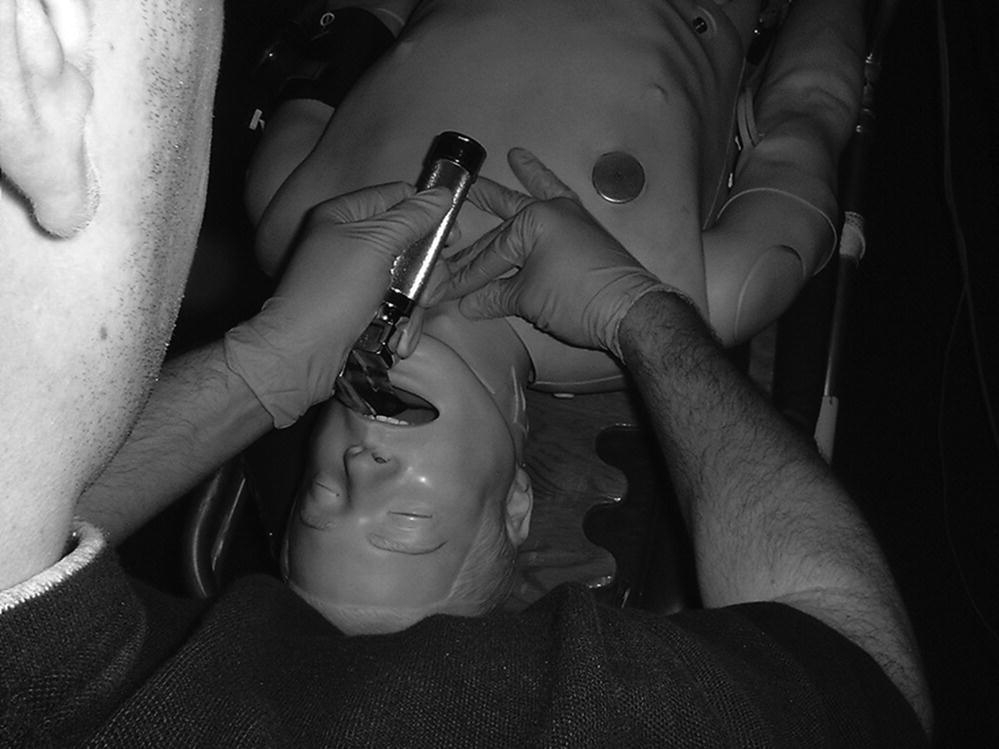
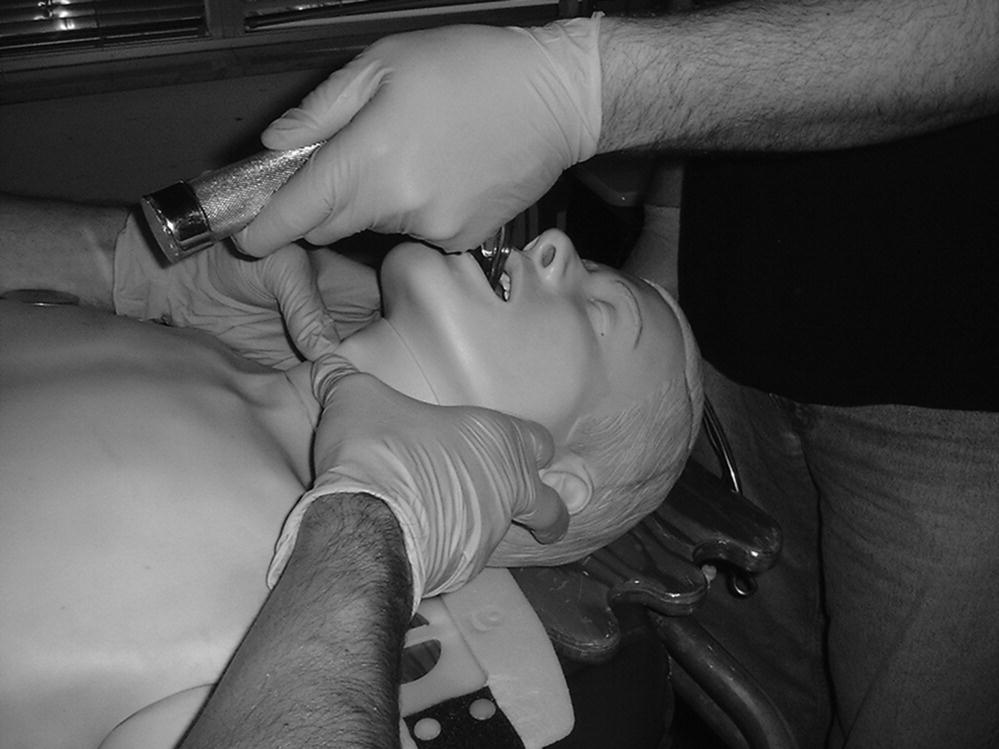
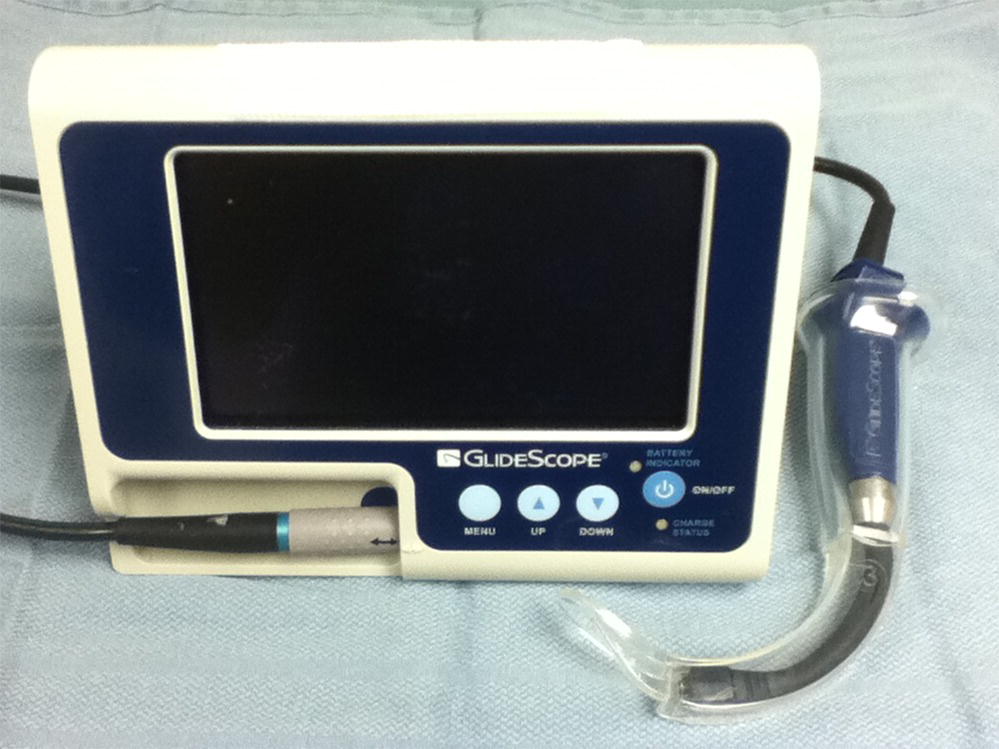
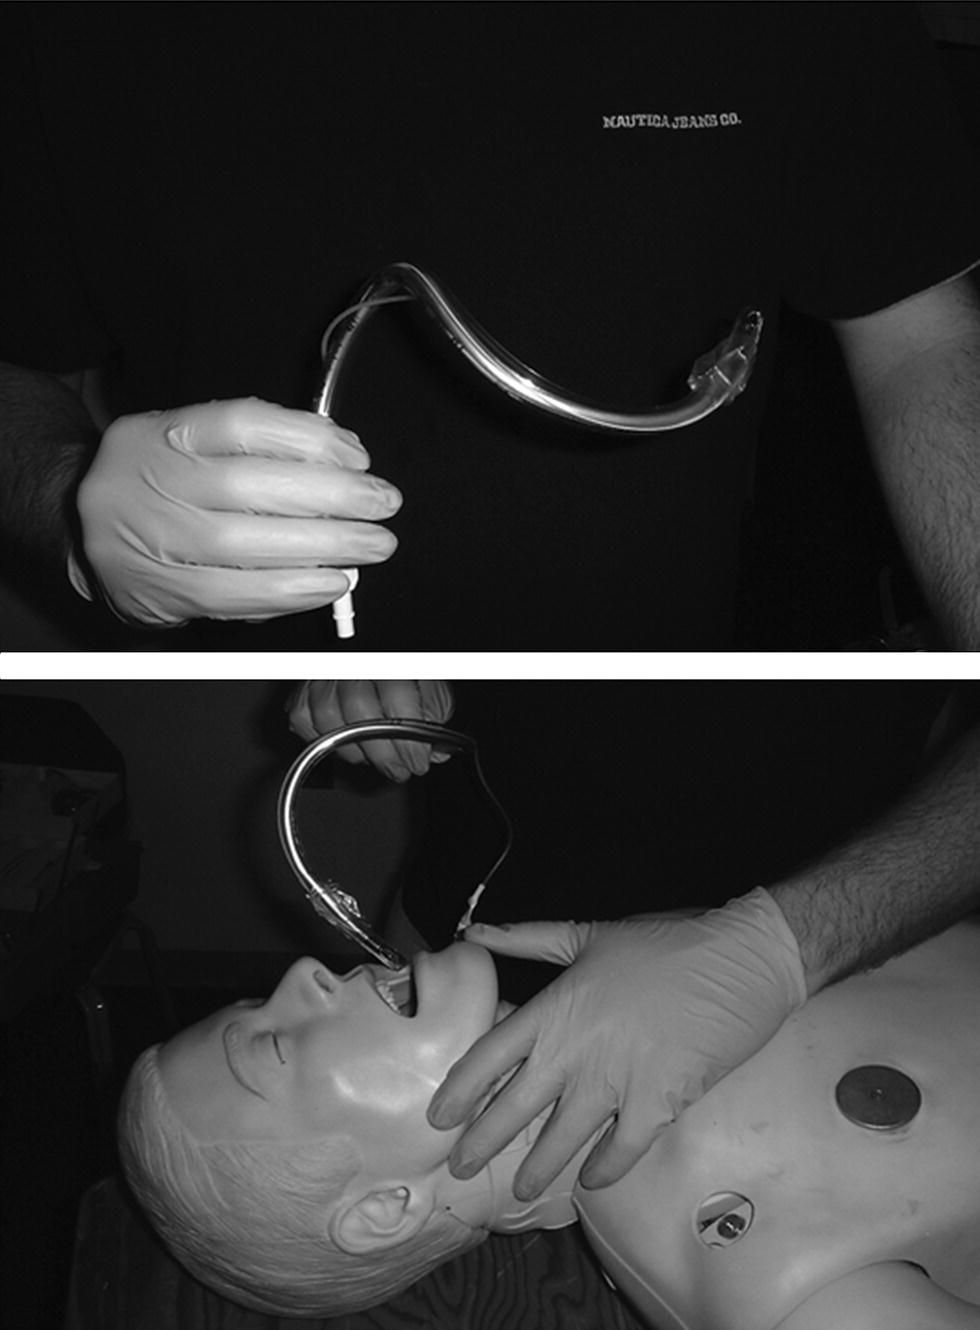
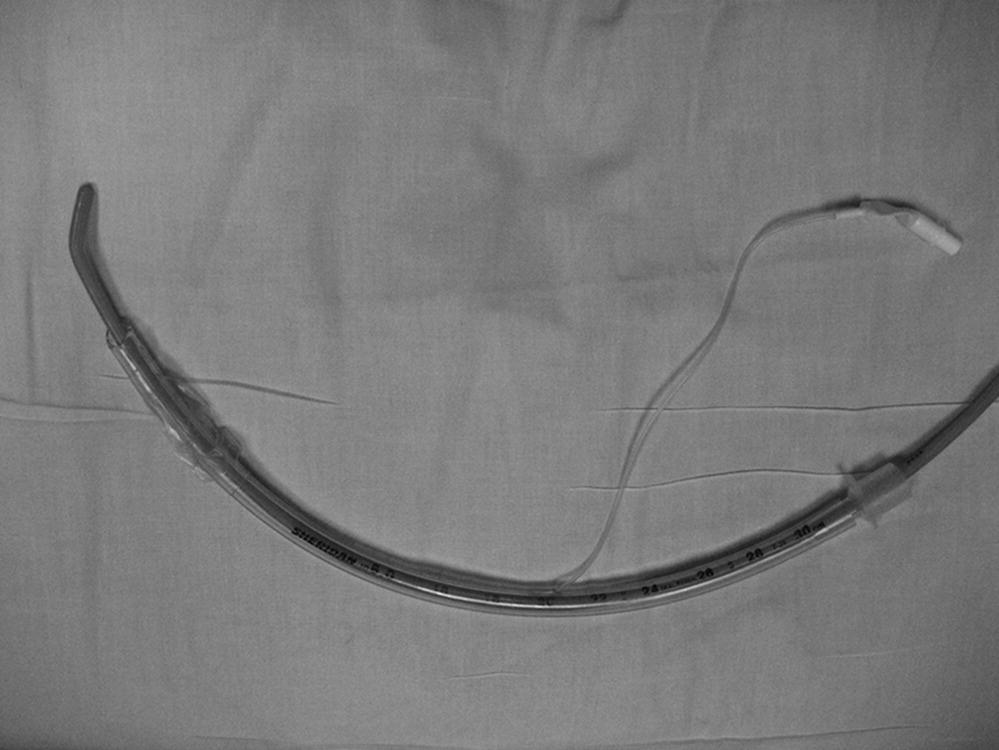
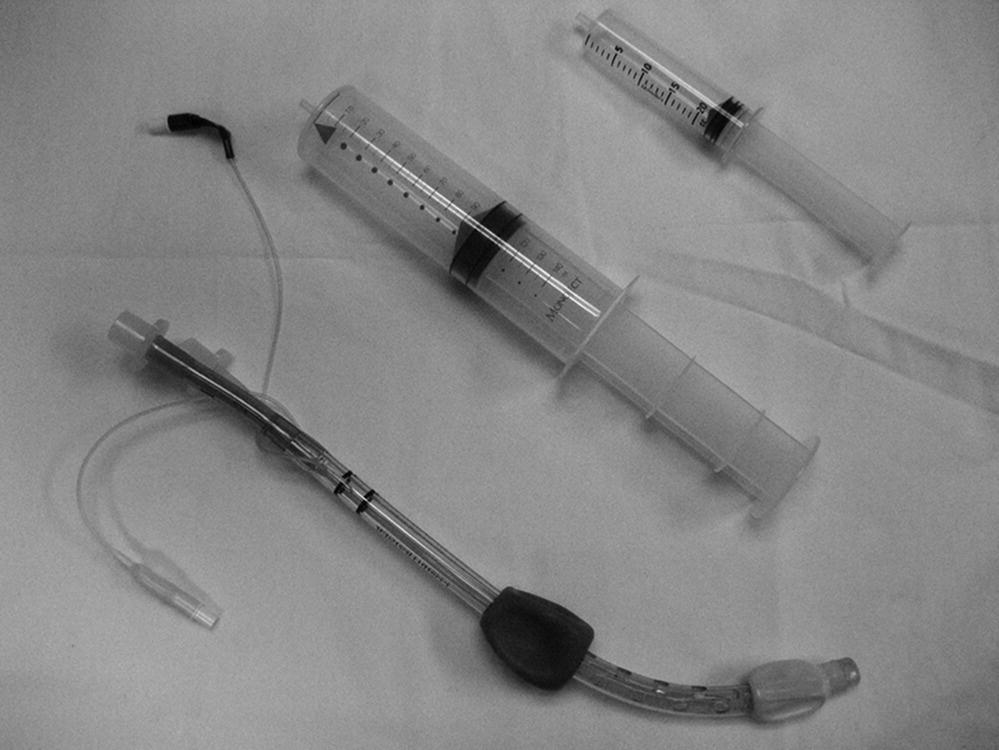
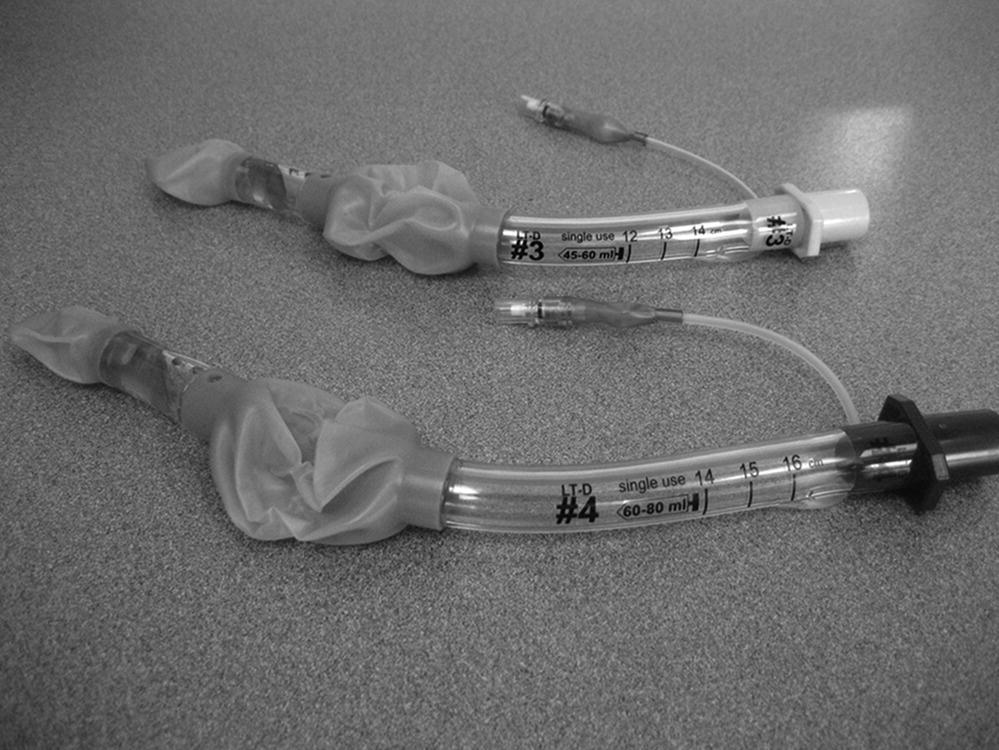
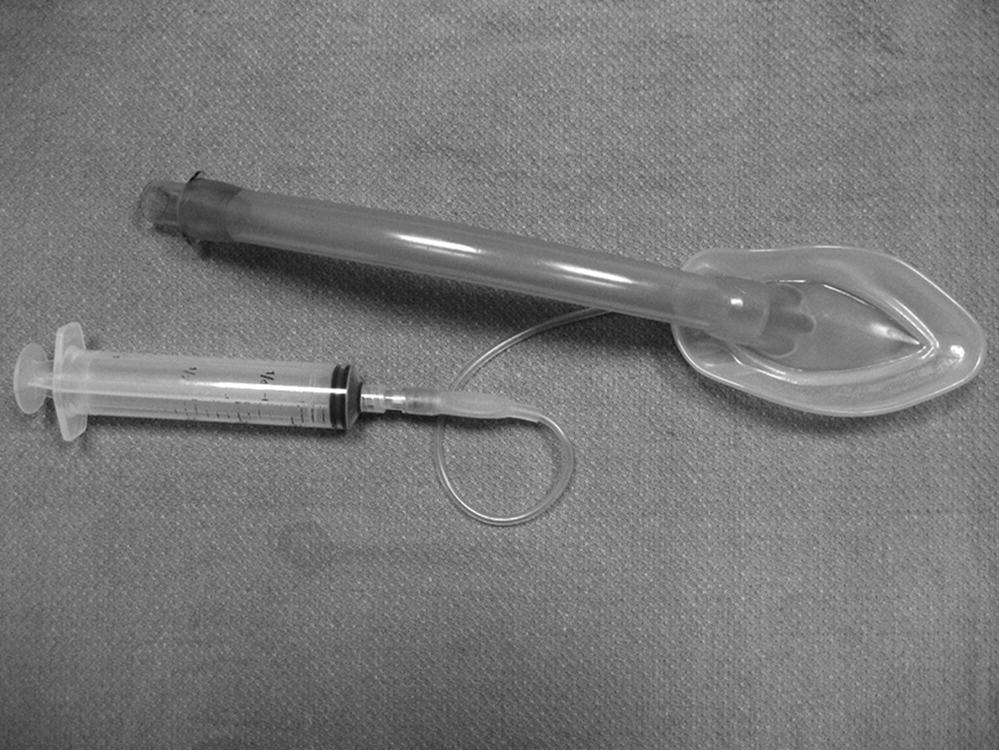
Chapter 3 Jestin N. Carlson and Henry E. Wang Airway management is one of the most essential interventions in the prehospital care of the critically ill or injured. This chapter provides an overview of the techniques and current controversies surrounding prehospital airway management. Basic airway interventions include measures to provide supplemental oxygen and/or ventilation without the use of an advanced airway device. These techniques are practiced by all prehospital providers, including first responders, EMTs, paramedics, and EMS physicians. In spontaneously breathing patients, prehospital EMS personnel may deliver supplemental oxygen using nasal cannulas or oxygen masks. The nasal cannula provides low-flow (2–5 L/min) oxygen in inhaled fractions (FiO2) from 21% to 40%. Oxygen masks used in the prehospital setting include simple face masks (6–10 L/min oxygen delivery, 40–60% FiO2) and non-rebreather masks (10–15 L/min oxygen delivery, close to 100% FiO2). Oxygen cannulas and masks are designed for patients with spontaneous respiratory drive and intact protective airway reflexes. Patients with frank respiratory compromise or apnea should receive bag-valve-mask ventilation support or advanced airway management. The standard teaching for EMS personnel is to provide oxygen to all patients with actual or potential for hypoxia. In practice, it is best to base supplemental oxygen protocols and practices on clinical findings. While some EMS agencies use pulse oximetry to titrate oxygen therapy for specific oxygen saturation deficits, this approach may shift EMS personnel focus to oxygen saturation readings, rather than the patient’s physical findings. Many patients with acute respiratory compromise present with increased respiratory rates (over 40–50 breaths/minute), not necessarily hypoventilation, hypoxia, or apnea. Bag-valve-mask (BVM) ventilation is the primary method for providing active ventilatory support without the use of an advanced airway device (Figure 3.1). The key BVM device components include a self-inflating bag, oxygen reservoir, and conforming face mask. The primary indications for BVM ventilation include hypoventilation (inadequate respiratory drive or effort) or frank apnea. Figure 3.1 Bag-valve-mask (BVM) ventilation. The technique of BVM ventilation is difficult, requiring rescuers to open the airway and maintain a mask seal with one hand while squeezing the ventilation bag with the other hand. Seasoned providers often recommend performing BVM using a two-person technique, with one rescuer opening the airway and holding the mask with both hands, and the other squeezing the bag [1]. Two-handed BVM techniques provide greater tidal volumes than one-handed techniques [2]. Several studies have demonstrated the difficulty of performing effective BVM ventilation, particularly in a moving ambulance or during prolonged resuscitation efforts; this is one of the motivations for the use of advanced airway in many prehospital patients [3]. An important potential adverse effect associated with BVM ventilation is gastric insufflation, which may result in regurgitation and aspiration of gastric contents into the airway. Many anesthesiologists use Sellick’s maneuver (cricoid pressure) to minimize gastric insufflation during operating room BVM ventilation [4–7]. While probably not harmful, this technique has not been proven to be helpful in the prehospital setting. The demand valve is an oxygen-powered resuscitator that delivers high-flow oxygen through a mask via a trigger valve. The valve is actuated by a single finger, allowing the rescuer to use both hands to seal the mask and open the airway. The major limitation of this device is the inability to sense lung compliance, which may be important in the presence of barotrauma or pneumothorax. Formal comparisons to BVM ventilation or other ventilatory devices remain limited [8,9]. Although once popular, fewer agencies appear to be using these devices. Oropharyngeal and nasopharyngeal airways are important adjuncts for basic airway support. The oropharyngeal airway is a curved plastic device that is inserted into the oropharynx, maintaining airway patency by lifting the tongue forward from the posterior wall of the pharynx. The nasopharyngeal airway is a soft plastic tube that is inserted through the nose, similarly facilitating airway patency. EMS personnel should use one of the adjuncts during BVM ventilation. Many clinicians report the simultaneous use of both devices in selected patients. While either adjunct may be suitable with a non-rebreather mask for a spontaneously breathing patient, insertion of the oropharyngeal airway should be reserved for patients without a gag reflex. Advanced airway management involves the insertion of an airway tube into the oropharynx and hypopharynx to facilitate oxygen delivery and ventilatory support. Advanced airway management is indicated in hypoventilating or apneic patients or individuals with actual or potential airway compromise. Current options for prehospital airway management include endotracheal intubation (ETI), supraglottic airways (SGA), and surgical airways. While advanced providers typically perform these techniques, ETI was an optional module in the prior national emergency medical technician curriculum; it is not listed as an emergency medical technician (EMT) or AEMT skill in the current National EMS Education Standards. In some areas EMTs may use SGAs [10,11]. SGAs are not included at the EMT level, but are included at the AEMT level, in the National EMS Education Standards. Endotracheal intubation is the most widely recognized method of advanced airway management. Paramedics have performed ETI in the United States for over 30 years [12–15]. ETI has many theoretical advantages, including the isolation of the airway from secretions or gastric contents and the provision of a direct conduit to the trachea without separate airway opening maneuvers. Direct orotracheal intubation is the most common method of ETI (Figure 3.2). In this approach the rescuer uses a lighted laryngoscope to displace the patient’s tongue and expose the epiglottis and vocal cords, permitting direct insertion of the endotracheal tube into the trachea. Figure 3.2 Orotracheal intubation. The most common laryngoscope blades used for orotracheal intubation include Macintosh (curved) and Miller (straight) blades, which require slight variations in laryngoscopic technique [16]. The rescuer places the curved Macintosh blade into the vallecula (the space immediately anterior to the epiglottis), facilitating indirect lifting of the epiglottis and exposure of the vocal cord structures. In contrast, the rescuer uses the broad side of the straight Miller blade to displace the oropharyngeal structures, using the tip of the blade to directly lift the epiglottis. Blade selection is a matter of personal preference; there are no data indicating the superiority of either blade in prehospital ETI. Orotracheal intubation optimally requires the absence or near-absence of protective airway reflexes. It is extremely difficult in patients who are awake or have intact airway reflexes. In these situations, drug-facilitated intubation techniques are often necessary to facilitate access to the oropharynx. In scenarios with potential cervical spine fracture or injury, EMS personnel must perform orotracheal intubation with “manual in-line stabilization” of the cervical spine, without hyperextension of the head or neck during laryngoscopy (Figure 3.3). This approach requires a second rescuer to manually hold the cervical spine “in line” during laryngoscopy attempts. Laryngoscopy and exposure of the vocal cord structures are relatively difficult while maintaining cervical spine stabilization. A critical review questions the value of manual in-line stabilization, suggesting that it significantly impairs laryngoscopy while not affording adequate spinal cord protection [17]. However, video laryngoscopy may provide adequate visualization of the glottis while minimizing cervical spine movement during ETI [18]. Figure 3.3 Manual in-line stabilization for intubation of the patient with suspected cervical spine injury. Video laryngoscopy uses a camera attached to the distal end of the blade of the laryngscope to obtain images of the anatomy that are then displayed on a video screen. Newer generation video laryngoscopes include portable and disposable configurations that may be used in the prehospital setting. While video laryngoscopy has demonstrated equal or improved ETI success rates when compared to traditional laryngoscopy in nearly all clinical settings, its cost is higher than conventional laryngoscopy [19–21]. Some studies suggest that proficiency with video laryngoscopy may be obtained in as few as five ETIs [22]. Some video laryngoscopes also allow providers to record their ETI efforts for offline review for quality improvement or educational initiatives [23]. Endotracheal intubation technique using video laryngoscopy depends upon the brand and model used. Although several different video laryngoscopes are available, the GlideScope® (Verathon, Bothell, WA) and C-MAC® (Karl Storz Corp., Tuttlingen, Germany) currently appear to be the most widely used. While some manufacturers provide standard Macintosh curved blades that allow for conventional direct laryngoscopy, such as the C-MAC, other manufacturers provide a hyper-curved blade, including the GlideScope (Figure 3.4). With the latter device, visualization of the vocal cords can only occur through the video screen; direct visualization of the vocal cords is not possible. In addition, because the pathway from the mouth to the vocal cords is no longer a straight line, the endotracheal tube and stylet must be bent with a slightly deeper curve. The GlideScope requires a specialized stylet for this application. Figure 3.4 GlideScope video laryngoscope. Nasotracheal intubation involves insertion of an endotracheal tube through the nose and into the trachea. It is possible only in patients with intact respiratory efforts, for example, individuals with congestive heart failure or acute pulmonary edema. The approach may be possible for patients who cannot lay supine, for example, patients entrapped after a motor vehicle collision. In contrast with orotracheal methods, nasotracheal intubation is often possible in awake patients, and those with intact gag reflexes or trismus. Successful nasotracheal intubation requires a skilled and experienced operator. The rescuer chooses an endotracheal tube one-half size smaller than customary for orotracheal intubation, inserting the tube into the nares without a stylet and directing the endotracheal tube inferiorly and anteriorly towards the vocal cords. Experts recommend first entering the right nostril, which is often larger than the left. The rescuer coordinates insertion of the tube through the vocal cords with patient inhalation. The Endotrol® (Mallinckrodt, Inc., Hazelwood, MO) endotracheal tube has a special trigger device that flexes the tip of the tube, facilitating its direction toward the larynx as the tube is advanced A sometimes helpful adjunct is the Beck Airway Airflow Monitor (BAAM®, Great Plains Ballistics, Lubbock, TX). When placed on the connector end of the endotracheal tube, the device “whistles” as the tube approaches the vocal cords. Important complications associated with nasotracheal intubation include nasal trauma and epistaxis, sinusitis (which may cause sepsis), and perforation of the cribiform plate with subsequent intracranial placement [25–29]. Digital intubation is one of the original methods of endotracheal intubation [30]. In this technique, the rescuer places his/her second and third fingers into the patient’s pharynx, forming a cradle extending to the epiglottis and the vocal cords. The rescuer then uses the other hand to guide an endotracheal tube along the cradle and through the vocal cords. Some clinicians recommend twisting the endotracheal tube into a corkscrew shape to facilitate the technique (Figure 3.5). Digital intubation may be viable in unresponsive patients where EMS personnel have limited access to the airway. The technique could result in rescuer injury should the patient bite down during the procedure [31]. Some clinicians advocate the concurrent use of a dental prod or mouth gag during digital intubation efforts. Figure 3.5 Corkscrew of endotracheal tube for digital intubation. The lighted stylet is a semi-rigid stylet equipped with a battery-powered lighted tip [31]. The rescuer inserts the stylet through the endotracheal tube and bends the combination into a “hockey stick” shape. The rescuer then inserts the stylet/endotracheal tube combination blindly into the oropharynx and uses the light to facilitate movement of the tube through the vocal cords. When properly placed, the bulb of the lighted stylet is visible through the patient’s cricoid membrane. Few EMS agencies use lighted stylet intubation due to the cost of the device and difficulty of the technique. Further, the procedure is limited by the need for low ambient lighting. In retrograde intubation, the rescuer places a large-bore needle through the cricothyroid membrane, pointing it cephalad, and then inserts a guidewire through the needle, advancing it superiorly until the wire tip comes out through the mouth. A conventional endotracheal tube can then be threaded over the guidewire and through the vocal cords. It is important that the wire be threaded through the “Murphy’s eye” of the tube. Commercial kits exist for retrograde intubation. Only limited data support this technique in the prehospital environment [32]. The gum elastic bougie, an adjunct for orotracheal intubation, is essentially a semi-rigid stylet (Figure 3.6). The rescuer performs conventional orotracheal laryngoscopy, placing the bougie through the vocal cords and into the trachea. Because the bougie is smaller and stiffer than an endotracheal tube, it is usually easier to place through the vocal cords. The angled, “hockey stick” tip also provides tactile feedback from the tracheal rings, assuring that the device is in the correct endotracheal position. The rescuer can slide a conventional endotracheal tube over the bougie and through the vocal cords before removing the bougie. Limited data describe the use of the bougie in the prehospital setting but generally describe improved ETI success [33,34]. Figure 3.6 Gum elastic bougie. Supraglottic airways are advanced airway devices used to facilitate ventilation without the use of conventional endotracheal tubes [35]. Other terms commonly used to describe SGAs include extraglottic airway, rescue airway, secondary airway, failed airway device, difficult airway device, salvage airway, alternate airway, and back-up airway. In current prehospital practice, EMS personnel typically reserve SGAs use for situations with failed ETI efforts, but recent reports suggest a potential primary role for SGAs [36]. The most common SGAs in current North American prehospital use are the esophageal tracheal Combitube™ (ETC), the King laryngotracheal (King LT™) airway, and the laryngeal mask airway (LMA™). When EMS personnel have inserted a SGA, instead of ETI, they should provide advance notification to the receiving ED. The SGA may require exchange to an endotracheal tube or surgical airway, and the receiving ED may need additional time to prepare or to assemble an appropriate team. The ETC is a double-lumen tube with a distal and a proximal balloon [37] (Figure 3.7). The rescuer inserts the ETC blindly into the patient’s mouth, typically positioning the smaller distal balloon in the esophagus and the larger proximal balloon in the oropharnyx. If the distal part of the ETC is correctly positioned in the esophagus (the most common position), insufflation through the longer, blue-colored lumen will deliver oxygen indirectly to the trachea through holes in the blue-colored tube at the level of the vocal cords. If the distal part of the ETC is positioned in the trachea, insufflation through the shorter, white-colored tube will deliver oxygen directly to the trachea. Auscultation or visualization of chest rise may not correctly discriminate between esophageal and endotracheal placement of the airway. End-tidal carbon dioxide detection is recommended to help identify the correct port for insufflation. Figure 3.7 Esophageal tracheal Combitube. Multiple studies have verified the adequacy of ventilation and feasibility of ETC insertion in the prehospital setting [37,38]. The ETC currently comes in two sizes, including a standard size (for patients >5’6”) as well as a smaller (Combitube SA™) size for shorter individuals (<5’6”). The smaller SA size often works satisfactorily in taller patients. Pediatric ETC sizes do not exist. Complications attributed to ETC include oropharyngeal bleeding, esophageal perforation, and aspiration pneumonitis, among others [39]. Some agencies have trained EMTs to insert ETCs [10,11,40]. The King LT is a SGA that resembles an ETC but consists of a single-lumen tube (Figure 3.8). A single insufflation port simultaneously inflates two balloon cuffs. Shorter and smaller than an ETC, the King LT design is supposed to facilitate more consistent placement in the esophagus. Insertion of the King LT airway is very similar to the Combitube. After balloon cuff inflation, the rescuer may need to withdraw the tube slightly to seal the balloon against the oropharyngeal structures. Figure 3.8 King LT airway. Disposable versions of the device exist for prehospital application. There is also a version with an esophageal port permitting concurrent placement of an orogastric tube. In addition to three different adult sizes, pediatric sizes of the King LT are also available. Given the simplicity of its design, the King LT can be rapidly placed by providers with a range of skills in a variety of clinical settings [41]. The LMA is a SGA originally designed for use in the operating room [42] (Figure 3.9). The distal tip of the airway contains a spade-shaped balloon designed to seal around the vocal cord structures. The rescuer inserts the device blindly through the oropharynx, positioning the cuff around the laryngeal structures. Inflation of the cuff facilitates proper sealing of the device. Figure 3.9 Laryngeal mask airway.
Airway procedures
Introduction
Basic airway interventions
Oxygen cannulas and face masks
Bag-valve-mask ventilation
Demand valve ventilation
Oropharyngeal and nasopharyngeal airways
Advanced airway management
Endotracheal or tracheal intubation
Orotracheal intubation
Video laryngoscopy
Nasotracheal intubation
Other intubation techniques
Supraglottic airways
Esophageal tracheal Combitube
King laryngotracheal airway
Laryngeal mask airway
Related posts:


Stay updated, free articles. Join our Telegram channel

Full access? Get Clinical Tree


